ASCENT SYSTEMS
BALLOON
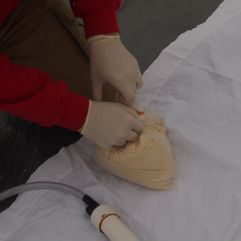
The balloon, a Kaymont balloon, arrived sealed in a plastic bag within a shipping box. A cursory inspection of the nozzle was made when it arrived, and the bag re-sealed. No further work was required until launch, when the balloon was carefully removed from the bag by a handler wearing latex gloves, and unrolled to its full length during the inflation phase.
INFLATION SYSTEM
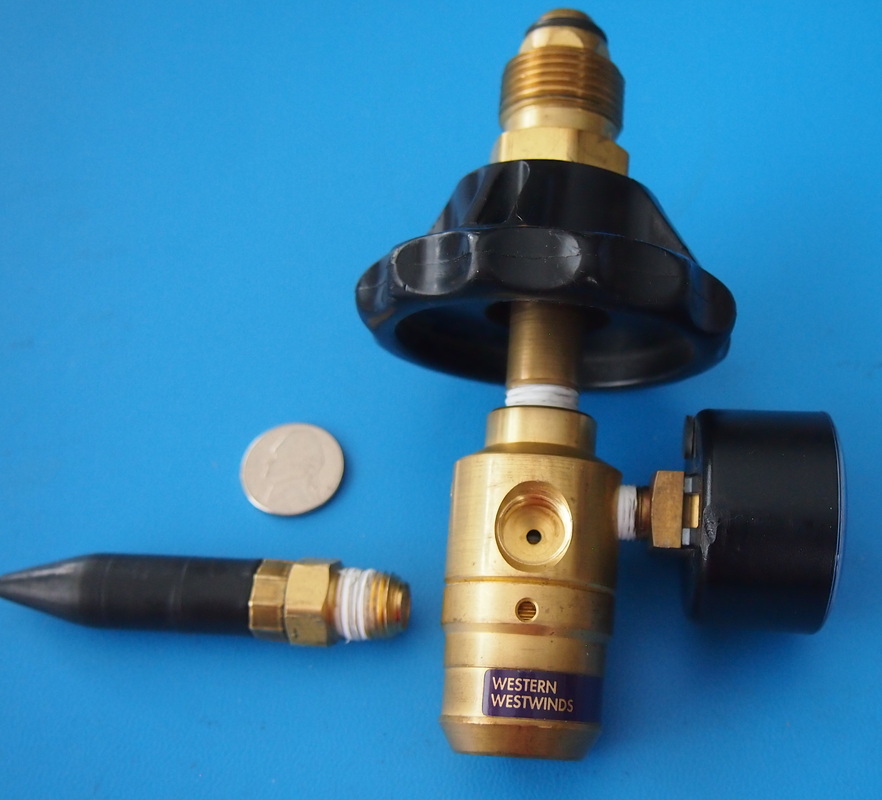
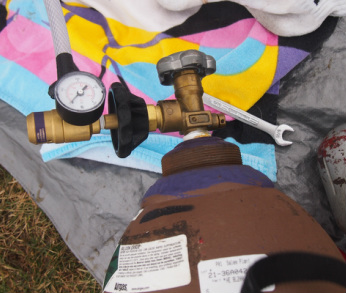
An existing regulator/valve made by Westwinds Inc was used, as many others have done, since it was available. These are used to inflate party balloons from a high-pressure helium tank. Unfortunately, the regulator in this case is the rubber nipple, which when pushed, opens an internal diaphragm and allows a controlled rate of flow (moderate pressure) into a balloon. However, it did have the necessary fittings, a pressure gauge, and attaches to the helium tank, so the plan was to be very careful in opening the valve when inflating our balloon (again, tried by others). So the nipple was removed, and a inflation system fabricated to take it's place.
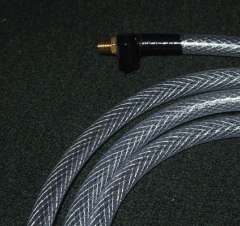
The inflation system consisted of a 10 ft length of high-pressure vinyl hose, rated at 225 psi, with an inner diameter of 3/8in and outer diameter 5/8in. At either end were attached 3/8in inner diameter x 1/4in MIP brass (hose) barbs, clamped down with hose clamps externally. These fittings have a 'ribbed' end or barb which inserts into the hose, and a (exterior) threaded end. Additionally, a layer of marine-grade silicone sealant was placed between fitting and hose. Finally, vinyl (electrical) tape was wrapped tightly around the assembly to blunt any sharp edges.
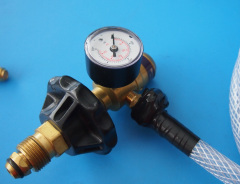
The brass barbs provided a 1/4in MIP threaded end. A hole was drilled through a 1.25 inch inner diameter PVC cap, just sufficiently large to allow the threaded end through. A rubber washer was placed at the base of the fitting before it was inserted into this hole, and another washer placed in the threaded fitting from within the interior of the cap, after the fitting was inserted into the hole in the cap. The marine-grade sealant was also applied liberally around the base of the fitting where it meets the PVC cap. A brass-pipe 1/4in FIP coupling was then screwed down on the threaded fitting, clamping down the entire assembly to the cap (hose fitting, washers, sealant) from the interior end. This was done on one end of the hose assembly; the other end was left as-is, since this threaded fitting screws directly into the Westwinds valve.
A length of (TBD) 1.25 inch PVC pipe was then placed on the cap, and sealed in-place with heavy-grade PVC cement.
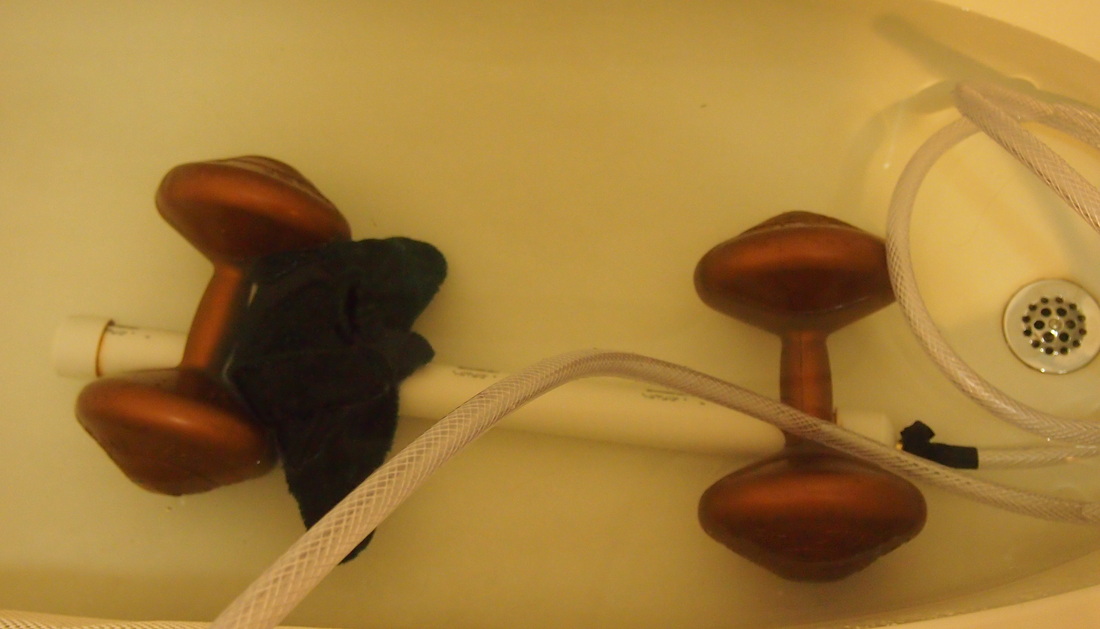
A one-time pressure test was performed on this ad-hoc design, to estimate how 'leaky' this design might be, that is, how much helium might be lost through the inflation system. To perform this pressure test, this PVC pipe was then capped with a PVC cap, and sealed in-place with PVC cement. This completed assembly of hose, fittings, and PVC section was then attached to the Westwinds regulator, which was then attached to another helium tank that was almost depleted, and showed <500 psi on the gauge. The PVC assembly was submerged in a tub of water, partially to observe bubbling, and partially for safety: this PVC is not rated for high-pressure, and could explode and splinter if it gave way. The valve was carefully opened from a safe distance, and it was observed that no leaking occurred.
At this point, one end of the PVC pipe +cap (the end not attached to the hose) was cut off with a PVC saw leaving an open pipe at one end, and a capped pipe attached to the hose at the other. This open end was sanded to form a blunt lip, using a power sander. This completed the inflation system. The length of hose and PVC pipe, and the interior volume of the PVC pipe, was thought sufficient to dissipate any sudden increase in pressure to a reasonable level, given the size of the balloon.
The inflation system consisted of a 10 ft length of high-pressure vinyl hose, rated at 225 psi, with an inner diameter of 3/8in and outer diameter 5/8in. At either end were attached 3/8in inner diameter x 1/4in MIP brass (hose) barbs, clamped down with hose clamps externally. These fittings have a 'ribbed' end or barb which inserts into the hose, and a (exterior) threaded end. Additionally, a layer of marine-grade silicone sealant was placed between fitting and hose. Finally, vinyl (electrical) tape was wrapped tightly around the assembly to blunt any sharp edges.
The brass barbs provided a 1/4in MIP threaded end. A hole was drilled through a 1.25 inch inner diameter PVC cap, just sufficiently large to allow the threaded end through. A rubber washer was placed at the base of the fitting before it was inserted into this hole, and another washer placed in the threaded fitting from within the interior of the cap, after the fitting was inserted into the hole in the cap. The marine-grade sealant was also applied liberally around the base of the fitting where it meets the PVC cap. A brass-pipe 1/4in FIP coupling was then screwed down on the threaded fitting, clamping down the entire assembly to the cap (hose fitting, washers, sealant) from the interior end. This was done on one end of the hose assembly; the other end was left as-is, since this threaded fitting screws directly into the Westwinds valve.
A length of (TBD) 1.25 inch PVC pipe was then placed on the cap, and sealed in-place with heavy-grade PVC cement.
A one-time pressure test was performed on this ad-hoc design, to estimate how 'leaky' this design might be, that is, how much helium might be lost through the inflation system. To perform this pressure test, this PVC pipe was then capped with a PVC cap, and sealed in-place with PVC cement. This completed assembly of hose, fittings, and PVC section was then attached to the Westwinds regulator, which was then attached to another helium tank that was almost depleted, and showed <500 psi on the gauge. The PVC assembly was submerged in a tub of water, partially to observe bubbling, and partially for safety: this PVC is not rated for high-pressure, and could explode and splinter if it gave way. The valve was carefully opened from a safe distance, and it was observed that no leaking occurred.
At this point, one end of the PVC pipe +cap (the end not attached to the hose) was cut off with a PVC saw leaving an open pipe at one end, and a capped pipe attached to the hose at the other. This open end was sanded to form a blunt lip, using a power sander. This completed the inflation system. The length of hose and PVC pipe, and the interior volume of the PVC pipe, was thought sufficient to dissipate any sudden increase in pressure to a reasonable level, given the size of the balloon.

|

|
|
LIFTING GAS
Helium was the lifting gas used for the balloon. Many groups have experimented with hydrogen as the lifting gas, as it is cheaper than helium due to helium's dramatic increase in price in recent years. (The price rise is in part due to the privatization of the National Helium Reserve.) However, for the first flight, helium was the safer option.
The simplest source of supply was Airgas USA LLC, a gas-supply company with a nationwide presence and a corresponding selection of distribution centers. To start the process, we set up a business account with the company, which was a matter of filling out paperwork at one of their offices. (An individual can establish a business account with Airgas.) Once they processed the paperwork (within a week), we had a business account established. This allowed 'rental' of a helium tank at any of their distribution centers, with prior notice. (Therefore, we could have conceivably rented the tank at their Albany NY distribution center the day prior to the launch and picked it up, vs. renting from their nearby MA center and driving it to the launch site.)
Renting a tank provides a full tank of helium, usually on for a month: use a little of use it all, the price is the same. The tank can be picked up in person, or can be delivered by Airgas for an extra fee. We opted for delivery: the order was placed on a Friday, and the tank was delivered to a residential address first thing Monday morning - great service from the Billerica MA sales office and the Salem MA fill plant!
We ordered their BL200 tank, which stood 5 ft tall & weighed about 160 lbs, with an internal volume of 1 liter, and held 219 cubic feet of pressurised (exceeding 2000 psi) helium gas. The rental was $191, but delivery fees (delivery fee, HAZMAT fee, fuel surcharge) put the final figure at $251. (For reference, they also offered a BL150 tank for $156 and a BL300 tank for $255.)
Different grades or purities of helium can be rented, ranging from balloon or industrial grade, to medical grade, to even higher grades (ultra high-purity) for special purposes. Having come across, during research, reports of balloon-grade helium being mixed with oxygen to prevent asphyxiation, we were worried about the true mixture of the delivered gas. A call to their sales office verified that the helium was guaranteed to be at least 99% pure. This was confirmed with a crude test where a party balloon was filled, and then weighted down until it achieved neutral buoyancy. Measuring the deflated weight of the weighted-down balloon, and estimating balloon volume confirmed that the gas was at least 95% pure. (There was too much uncertainty in the experiment to derive a more precise value, but the SpaceCat-1 launch data suggests it was closer to 99% purity.)
The tank itself was a real chore to handle, but it was of extremely sturdy construction: thick solid steel vs. the aluminum as rented by party supply stores. (A comfort when worrying what might happen in a car accident if a tank under that kind of pressure would rupture - but this kind of tank would very likely survive most any collision, or at least any collision short of one that would kill the passengers outright.) A rugged moving dolly is essential in maneuvering the tank, but another useful item for future launches would be ratchet straps that could clamp down on the tank and provide some grips.
One tank was sufficient to fully inflate the balloon. The residual pressure of the tank was reduced to 500 psi at that point.
|
|
|
RIGGING
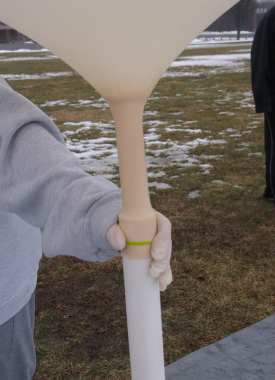
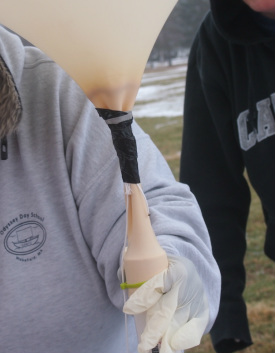
The Kaymont balloon was specified as having a 3 cm nozzle. This proved to fit very securely to the PVC inflation pipe: it was extremely difficult to place more than 7 cm of the balloon nozzle on to the pipe. Though the nozzle was quite securely attached to the inflation pipe at this point, a plastic cable tie was then placed to hold the balloon nozzle to the PVC pipe against all buffeting of the inflating balloon.
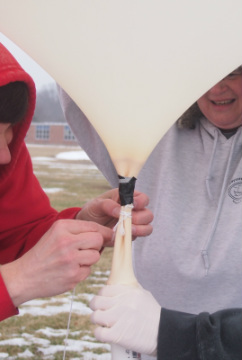
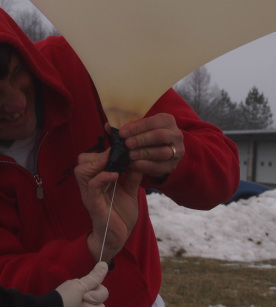
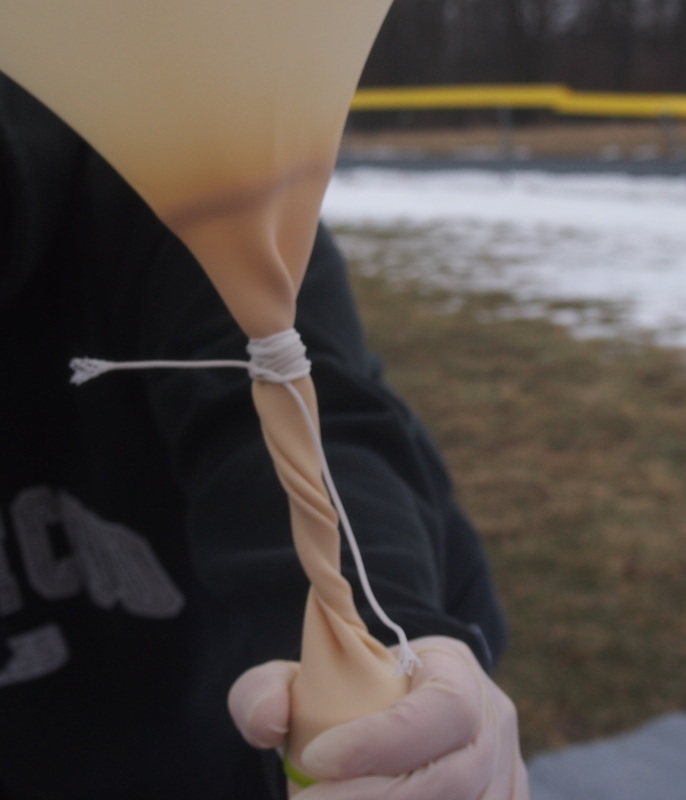
Once the balloon was fully inflated, a length of the Dacron line (the same 150 lb strength line used for the parachute rigging) was used to tie of the nozzle. A length of duct tape was placed over this first knot, to provide mechanical support and to prevent any slipping the knot.
The main line attaching balloon to parachute/spacecraft was then tied to the nozzle immediately below the first knot. Again, this knot was secured with duct tape. At this point, the balloon could be removed from the inflation pipe, since the line was secured and the balloon could be held in place by the handlers and with the line held down as security. The cable tie was carefully cut with small wire cutters, and the nozzle slid from the pipe.
The remaining end of the nozzle was then folded up against the nozzle section that had the knotted, taped sections from above. This folded nozzle end was tied down with Dacron line, and again secured with duct tape.
|
|

|
INFLATION, LAUNCH
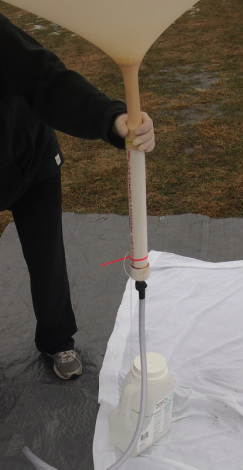
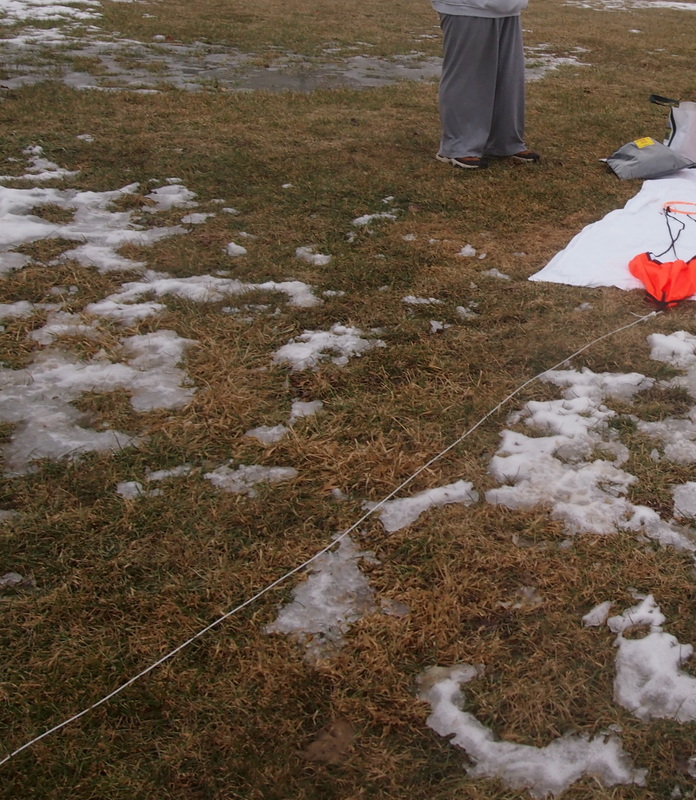
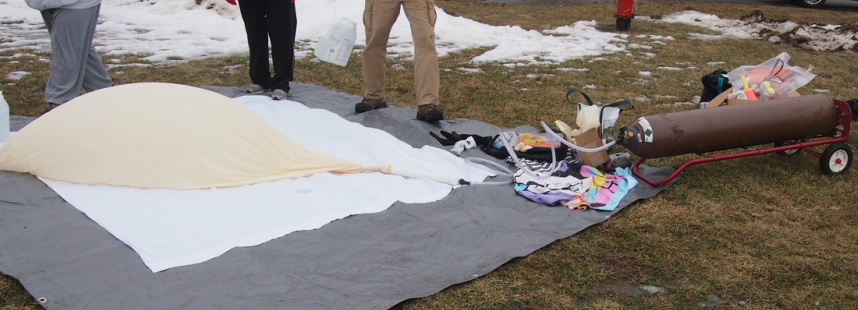
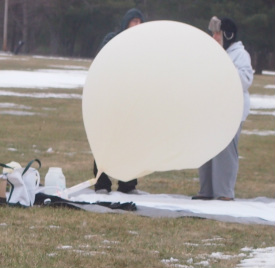
The balloon, attached to the inflation system, was unrolled on a clean bedsheet that was placed in-turn atop a heavy-duty tarp that was on level ground free of stones.
The inflation system was attached to the deployed helium tank. The PVC pipe of the inflation system was attached to a plastic jug via Dacron line: the jug was filled with the precise amount of water that ensured that the filled jug equaled the weight of the inflation system plus the desired lift required from the balloon. (This lift equalled the sum of the weight of the spacecraft+parachute+rigging+balloon, and the desired 'free' lift needed to provide the desired ascent rate.)
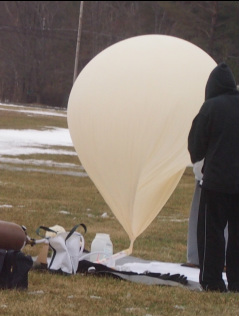
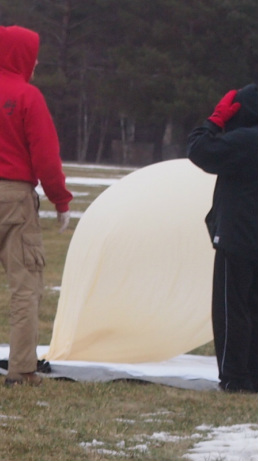
The valve on the inflation system was carefully opened a small amount, and helium gas started flowing smoothly. The balloon began to inflate. The gas flow was kept low on this first launch, and the balloon took over 30 min to fully inflate.
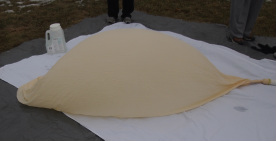
As the balloon inflated, it eventually lifted from the ground, and was held in position by the filled jug and assisted by the handlers. As the balloon neared the desired volume, it required more work by the handlers to keep it in position, but the lack of wind at the launch site made that fairly easy.
The balloon was deemed filled to the desired volume, when the jug started to lift from the ground. At this point, the valve was closed, and the rigging described above was completed.
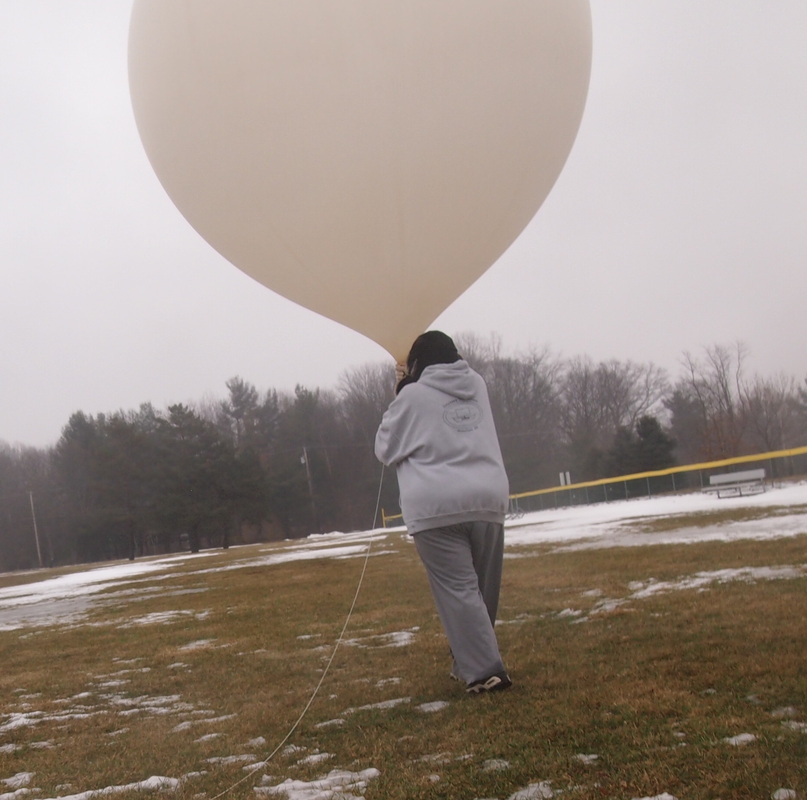
Once the rigging was completed, the balloon was allowed to rise, by holding on to the main line and allowing it to play out. This allowed the balloon to rise vertically: as it did so, the handler holding this main line walked back towards the spacecraft sitting on the ground. When the handler reached the spacecraft, the line was released. The balloon jerked the spacecraft off the ground with a clean motion and it continued to rise: there was no dragging of the spacecraft along the ground.
|
|

|
